Mold Maker Tutorial

NB - I have been challenged to produce this tutorial!
Have you thought of making texture plates out of mold maker? It is more flexible when cured than if you are using scrap clay.
Have you thought of making texture plates out of mold maker? It is more flexible when cured than if you are using scrap clay.
One
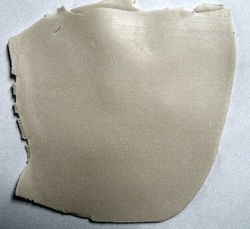
First chill your mold maker clay: it is softer than most polymer clays. (I put mine into the freezer for about 10 minutes) Roll out a piec around four inches square (10cm) on the thickest setting of your pasta machine.
You could make it thicker of course but I like the way a thin sheet bends. If you are doing deep indentations as your texture then you may prefer to make it thicker - so use two layers of a medium setting on your pasta machine
Two
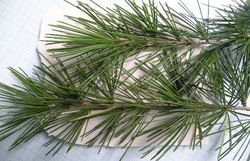
I am using some pieces of fir from my garden. Place these onto your Mold Maker and place a plain piece of paper on top of the fir - this because the pieces of the branch are less likey to move when you are flattening them.
Three

You can choose to use your roller to embed the required design into your Mold Maker
Four
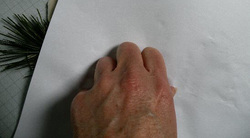
Or you can choose to press down firmly with your hands - I find this more effective because the fir pieces are less likely to slip and one can put more pressure on individual sections
Five
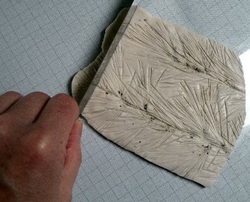
Once your design is embedded into the Mold Maker use your blade to neaten the edges of your piece
Notice that one or two of the indentations are quite rough - that enhances rather than detracts from your final texture plate
Six
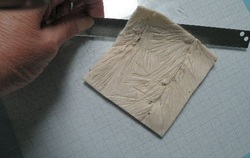
Lift the neatened piece from your surface using a blade : keep in mind that Mold Maker is, at this stage, very soft and must be treated with care
Cure your piece at 130 degrees C for 20 minutes ( although I give it 30 minutes!). Once cured, allow to cool
Cure your piece at 130 degrees C for 20 minutes ( although I give it 30 minutes!). Once cured, allow to cool
Seven
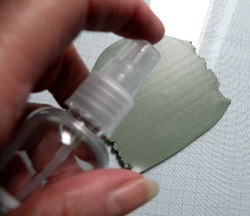
Roll out a piece of conditiond clay and spritz it lightly with water so that your texture plate does not stick to it.
I usually roll out on the thickest setting on the pasta machine - but of course it depends what you intend to make with it.
Eight
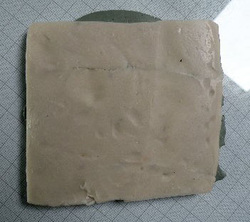
Place your new texture sheet, now cured and cooled, face down onto your piece of prepared clay
Nine
This time I recommend that you do use your fingers rather than a roller to press down firmly, as you want the impression to be as deep as possible and you do not want your texture plate to move. With your fingers you have more control.
Ten
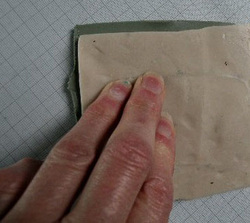
Dab a piece of kitchen roll on your clay to dry off any residual water
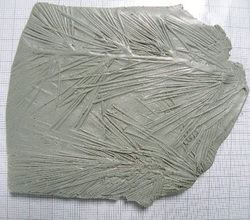
Here is the image created by my texture plate. I am very pleased with this.!
Eleven
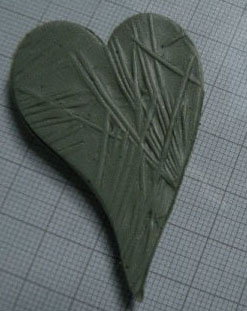
And here I have cut a shape out with a cutter ready to use to make into something interesting.
Post Script
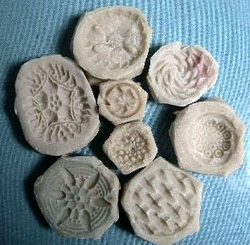
Logically, Mold maker also makes moulds: here are a collection of moulds I made from some antique buttons I have.
And a really useful hint from Lynne Ann Schwarzenberg - she uses minute amounts of Mold Maker to soften her clay before making just about every one of the wonderful canes she produces

You can buy your Mold Maker here!
